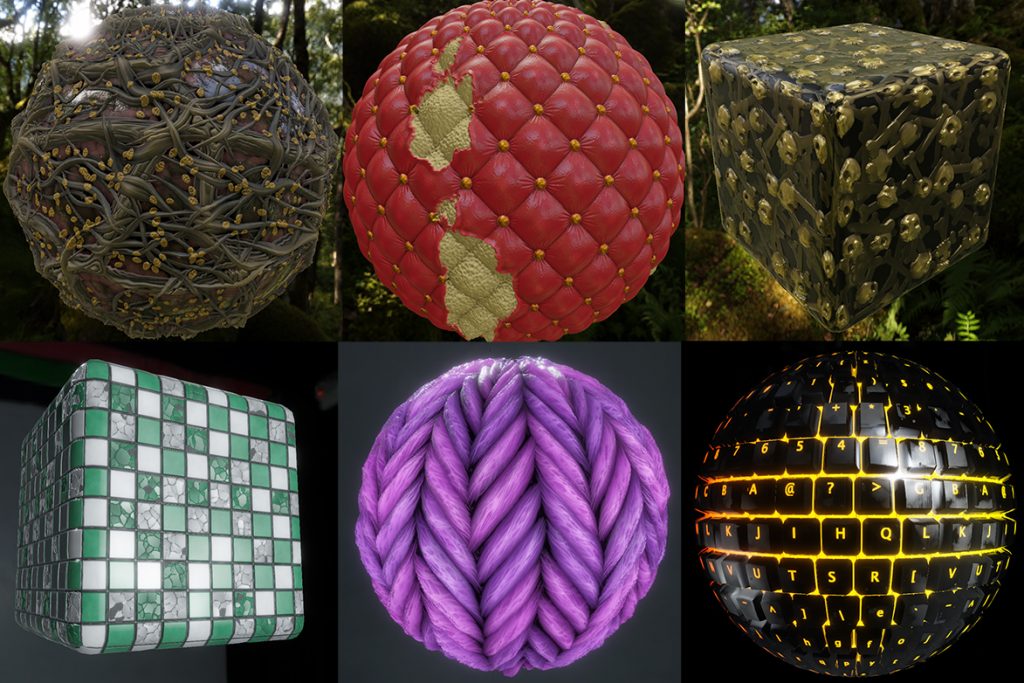
With Shade 1.2, many new things are possible. One of the biggest additions is the new material workflow. This allows you to make detailed tileable texture maps for Codea, Unity, Unreal and any other engine you fancy
This is a little different than just making a shader by itself, since these maps are generally baked ahead of time and will allow for much more freedom in terms of performance and complexity
For simplicity’s sake I’ll be referring to shaders that bake out maps like this as materials rather than shaders
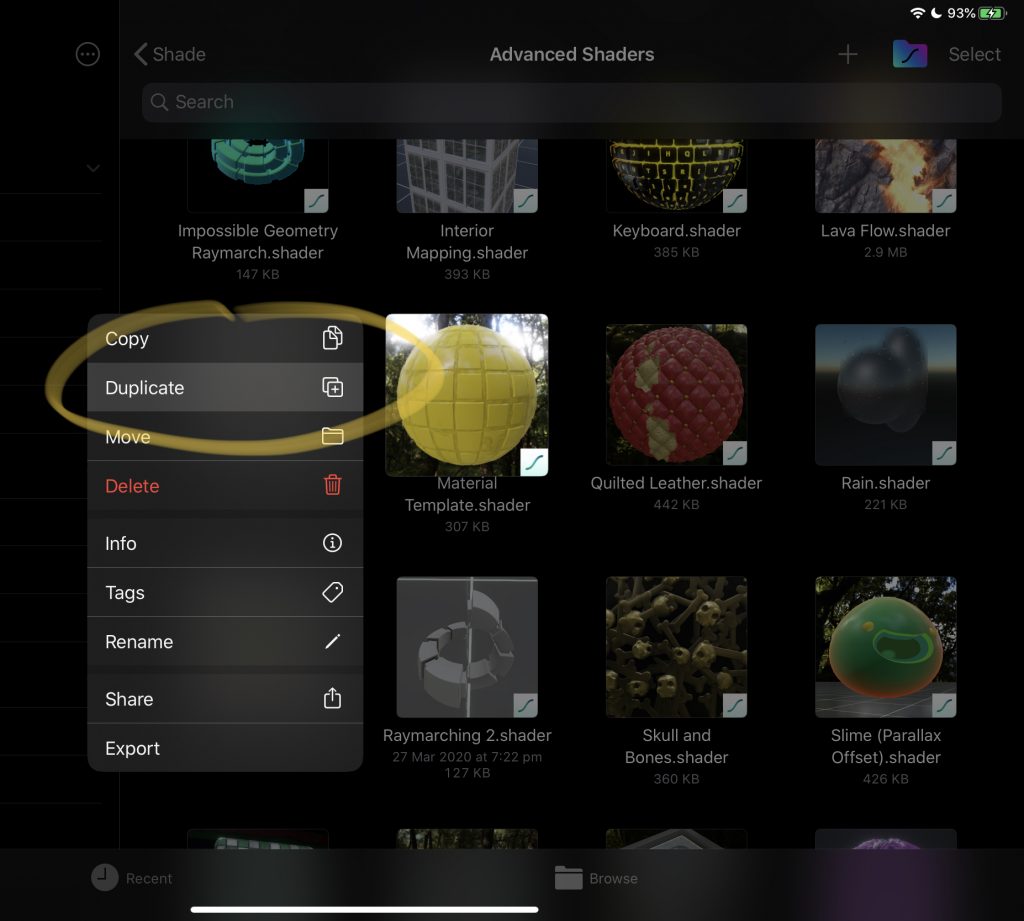
The Material Template
In the Advanced Shaders example folder you can find a new shader called Material Template. You can duplicate this and use it to bootstrap new materials (It’s in Shade/Documents/Advanced Shaders)
It contains a node setup that automatically generates and bakes maps for Diffuse, Roughness, Metalness, Height, Normals and Ambient Occlusion. Not all maps are required but the full set is there if you need it
The Tiler Node
The core of the new workflow is the Tiler node. Easily the most complex and powerful node in Shade. It was inspired by the various tiling nodes in Substance Designer but has a few new tricks up it’s sleeve as well
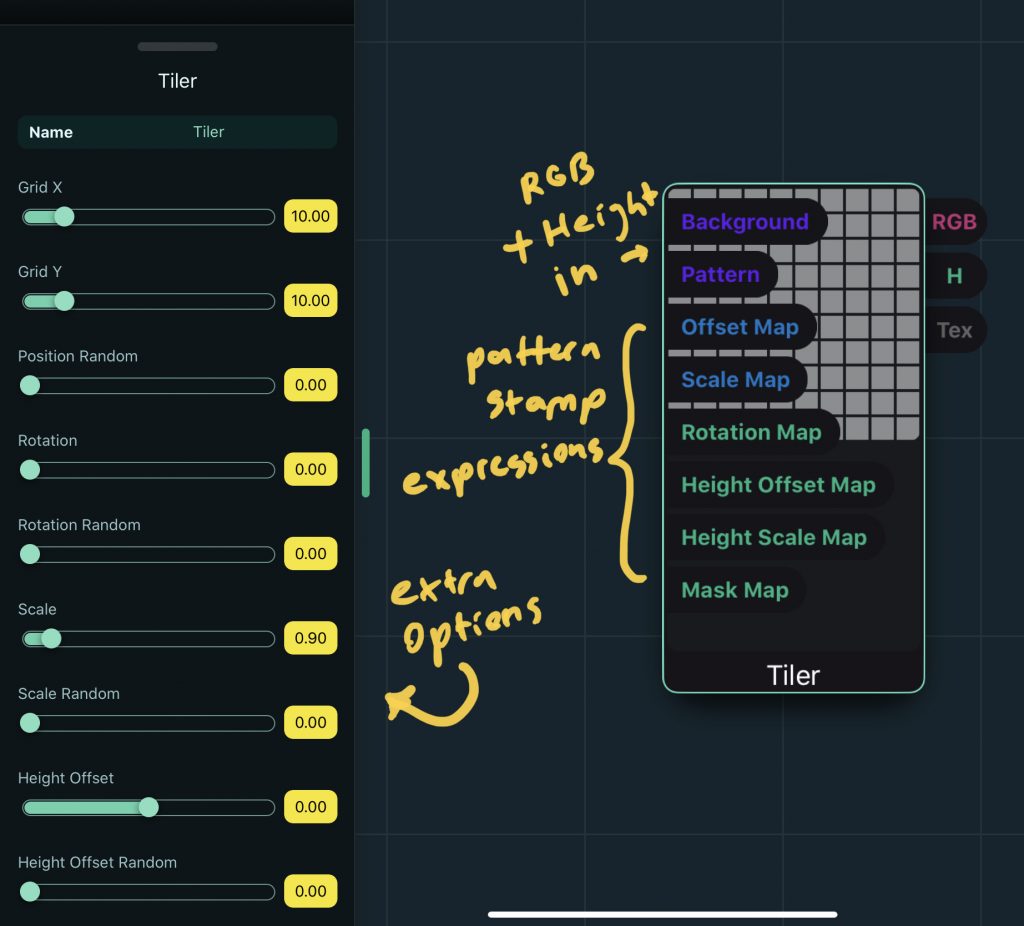
Patterns
The two main inputs are Background and Pattern. We’ll ignore Background for now and focus on Pattern. The pattern input takes an expression and stamps copies into a new baked texture. The default layout is a simple 10×10 grid, which can be customised in different ways
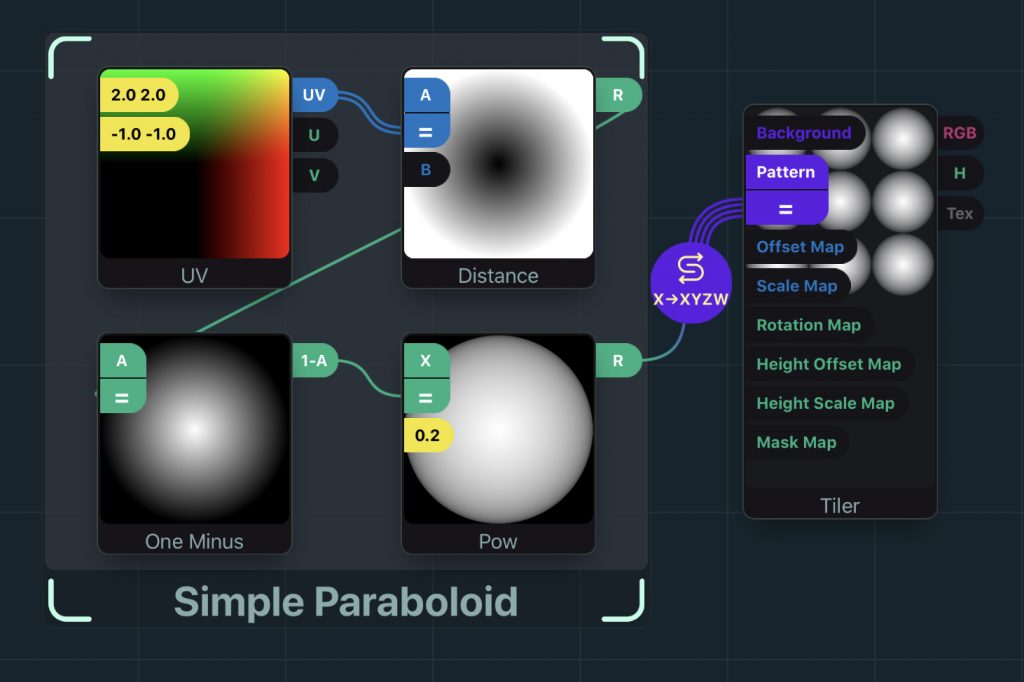
In the above example, I’ve used a simple paraboloid shape for the pattern. This is then stamped into a 3×3 grid. You’ll notice that the Pattern input has 4 components (a Vector 4), this is because you can include both colour and height information. When patterns are stamped they are sorted by height for each individual pixel. This allows for overlapping patterns to be blended properly. The colour used will depend on which pattern ‘wins’ for a given pixel
In the above example, you can create some tiling cellular noise by tweaking some of the Tiler node options. You can randomise position, scale, height offset/scale and also mask a percentage of the stamped patterns.
Map Expressions and Tile Data
Another key feature of the Tiler node is the ability to supply map expressions. This lets you modify position, scale, height and so on, based on which tile is being stamped. The Tile Data node supplies information about the current tile being processed, including ID, grid location and centroid which can be fed into these expressions
In the above example I took the Tile Data G (grid) output, using Split and Mod to mask out every second row, then multiplied that and fed it to the Offset Map input. This has the effect of only offsetting every second row, which is useful anywhere you want to selectively move tiles based on their initial layout (i.e. bricks, hexagon tessellation, etc…)
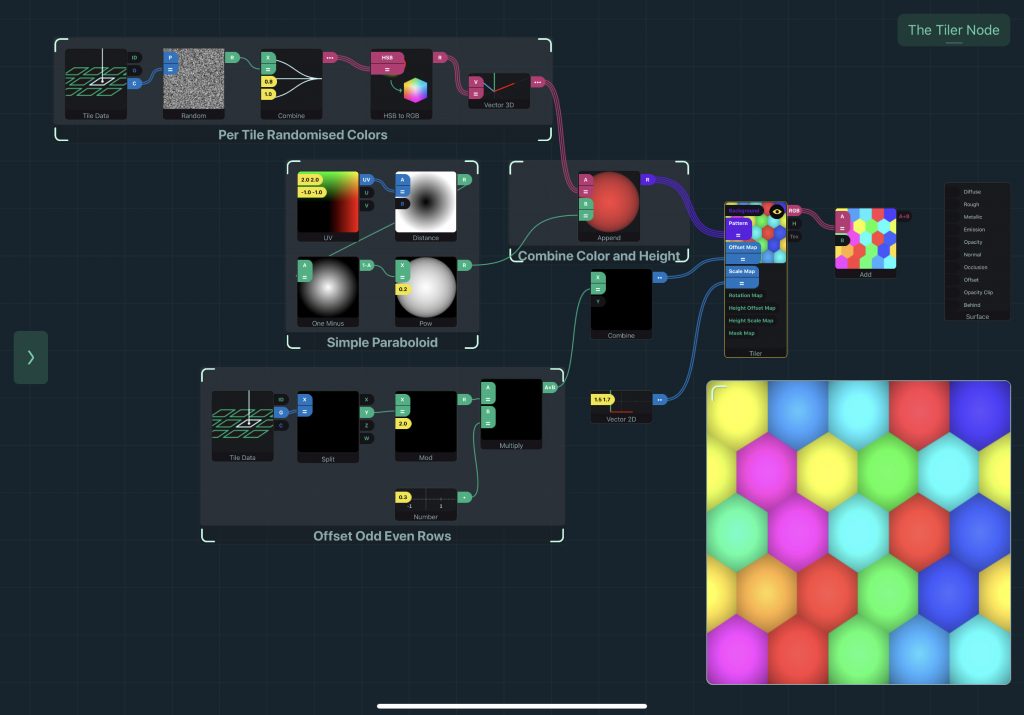
You can take this a step further by using tile data and converting that to a colour (via the Random and HSB to RGB nodes) and then appending that value with the pattern’s height
We can now easily take this height/colour data and use it to generate secondary maps via the Height to Normal and Ambient Occlusion nodes. this setup is already done for you when using the Material Template as a base
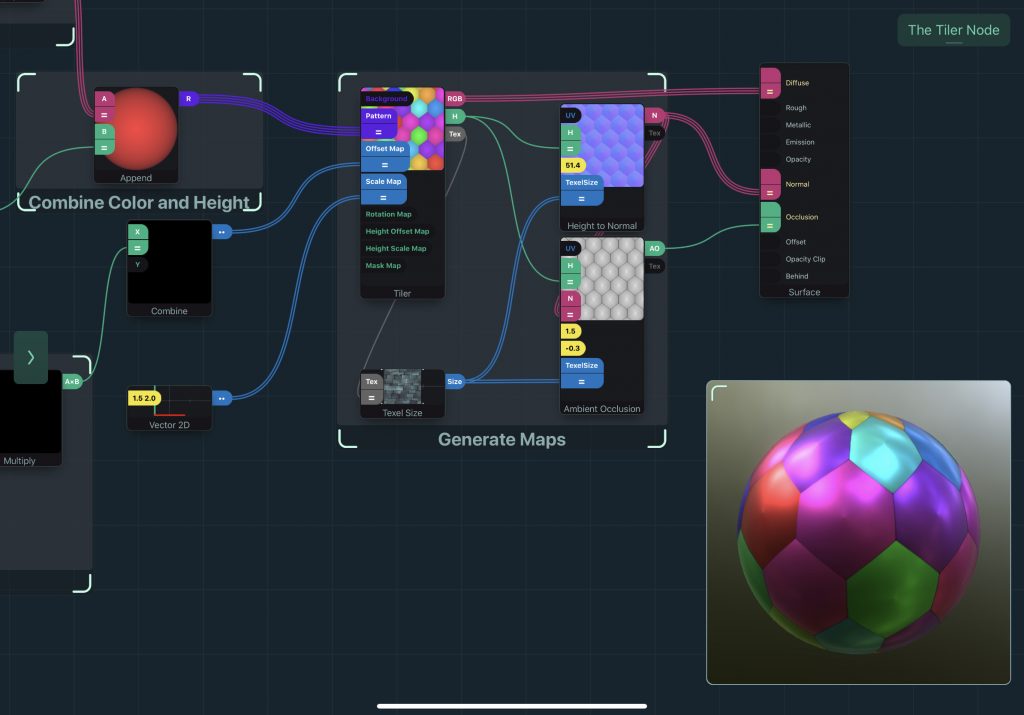

If you have issues with artefacts in the generated normals/occlusion maps you can enable 16 bit textures in the Tiler
If you want to save your normal/occlusion maps make sure to turn the Bake option on as well
This has been a basic introduction to the new material workflow in Shade along with the Tiler node. In the next part I will show step-by-step how to make a real world material in Shade using these techniques and more!